התקנה ותפעול תוכנה עבור חיתוך לייזר קטן
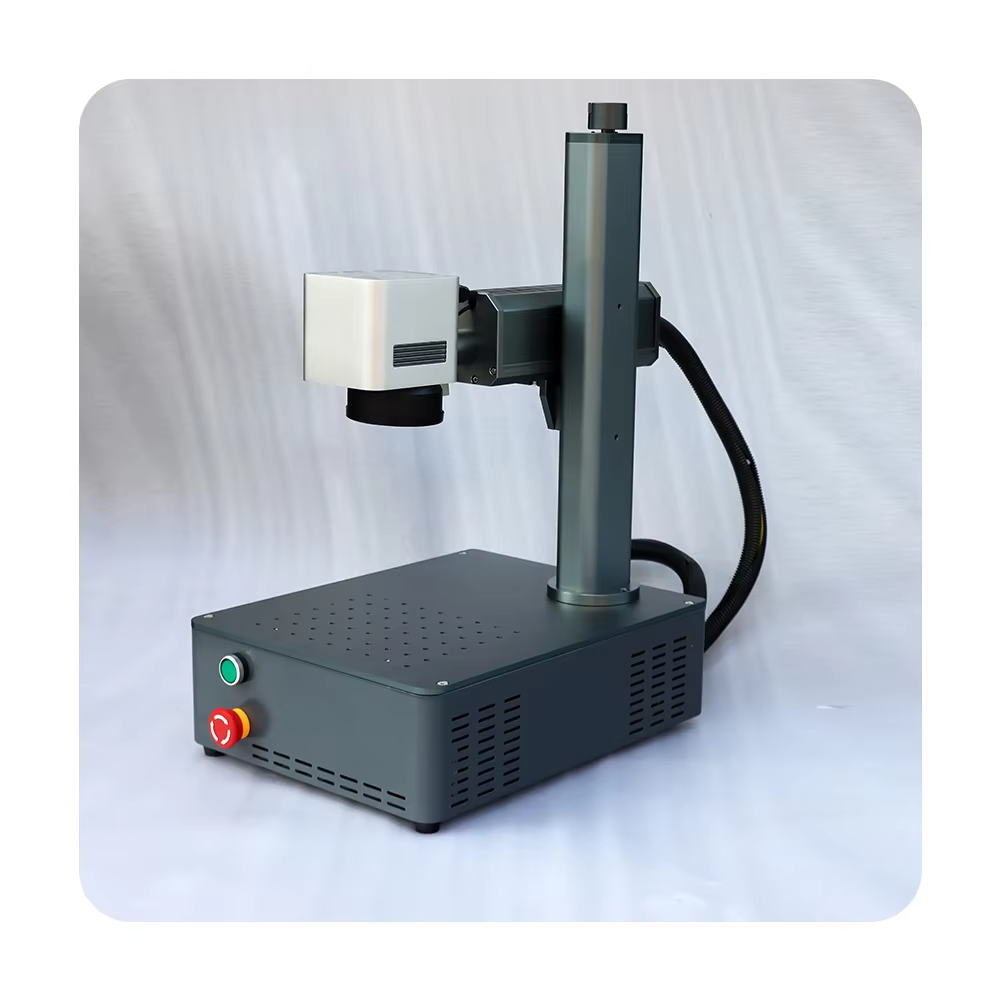
התחילו בכך שתפתחו בזהירות את כל הרכיבים על משטח עבודה נקי ומסודר. ודאו שכל פריט מופיע ברשימת המלאי של היצרן ובדקו אם יש נזקים משליחה. סרט הגנה חסר או חיבורים רופפים הם סימנים לבעיות פוטנציאליות שצריכות תיעוד מיידי.
הציבו את המכונה על משטח יציב וمقاوم לרטט, הרחק מחומרים דליקים וממקורות לחות. יישור הוא קריטי – משטחים לא ישרים גורמים לאי-יישור, מה שמוביל לחריטות לא enfוקוסיות. חיברו את מערכת הפליטה לפני הדלקת המכונה כדי למנוע הצטברות אדים, סיכון בריאותי חמור.
חברו קווי חשמל מוסדרים עם שקע מוארק שמתאים לדרישות של המכונה. חיווט מסובך יכול לפגוע בלוחות הבקרה. בדקו מחדש את כל נקודות ההרכבה שלכם (ש корпус העדשה, מסילות הגשר וכו') כדי לוודא שכל הרכיבים זזים חלק. התקנה מותאמת יכולה להפחית את מספר פגמי החיתוך ב-70% (לפי סטנדרטים תעשייתיים של לייזר). סיכמו את התהליך בתרגיל בפעולת חירום לפני בדיקת החומר.
אשר את האלקטרוניקה על ידי הפעלת מצבי אבחון. רעשים חריגים של מנוע צעד מצביעים על רצועות רופפות או בעיות מיסבים הדורשות תיקון מיידי. לעולם אל תדלג על בדיקות עצמיות של האתחול - 93% מהכשלים התפעוליים נובעים משלבי הגדרה שדילגו עליהם.
בחירת הכלים הנכונים היא קריטית עבור חיתוך לייזר קטן הצלחה. תקנות בתוכנה גורמות ל-68% מהתקלות בפעולה ראשונה ( יומן הפקה דיגיטלי , 2023).
בחירת תוכנת עיצוב: LightBurn ו- CorelDRAW השוואה
שתי פלטפורמות מובילות משרתות חיתוך לייזר קטן זרימות עבודה:
- LightBurn : מותאם למערכות לייזר עם קידומטים אינטואיטיביים לפי סוג המכשיר למודולציית הספק ו enfוקוס אוטומטי. אידיאלי למתחילים.
- CorelDRAW : מ enfוקס וקטור ל עיצובים מורכבים אך דורש קלט ידני של פרמטרים. הכי טוב למקצועי גרפיקה.
LightBurn מעבד חריטה 40% מהר יותר, בעוד ש-CorelDRAW מצטיין ב גמישות בעיצוב טרום חריטה.
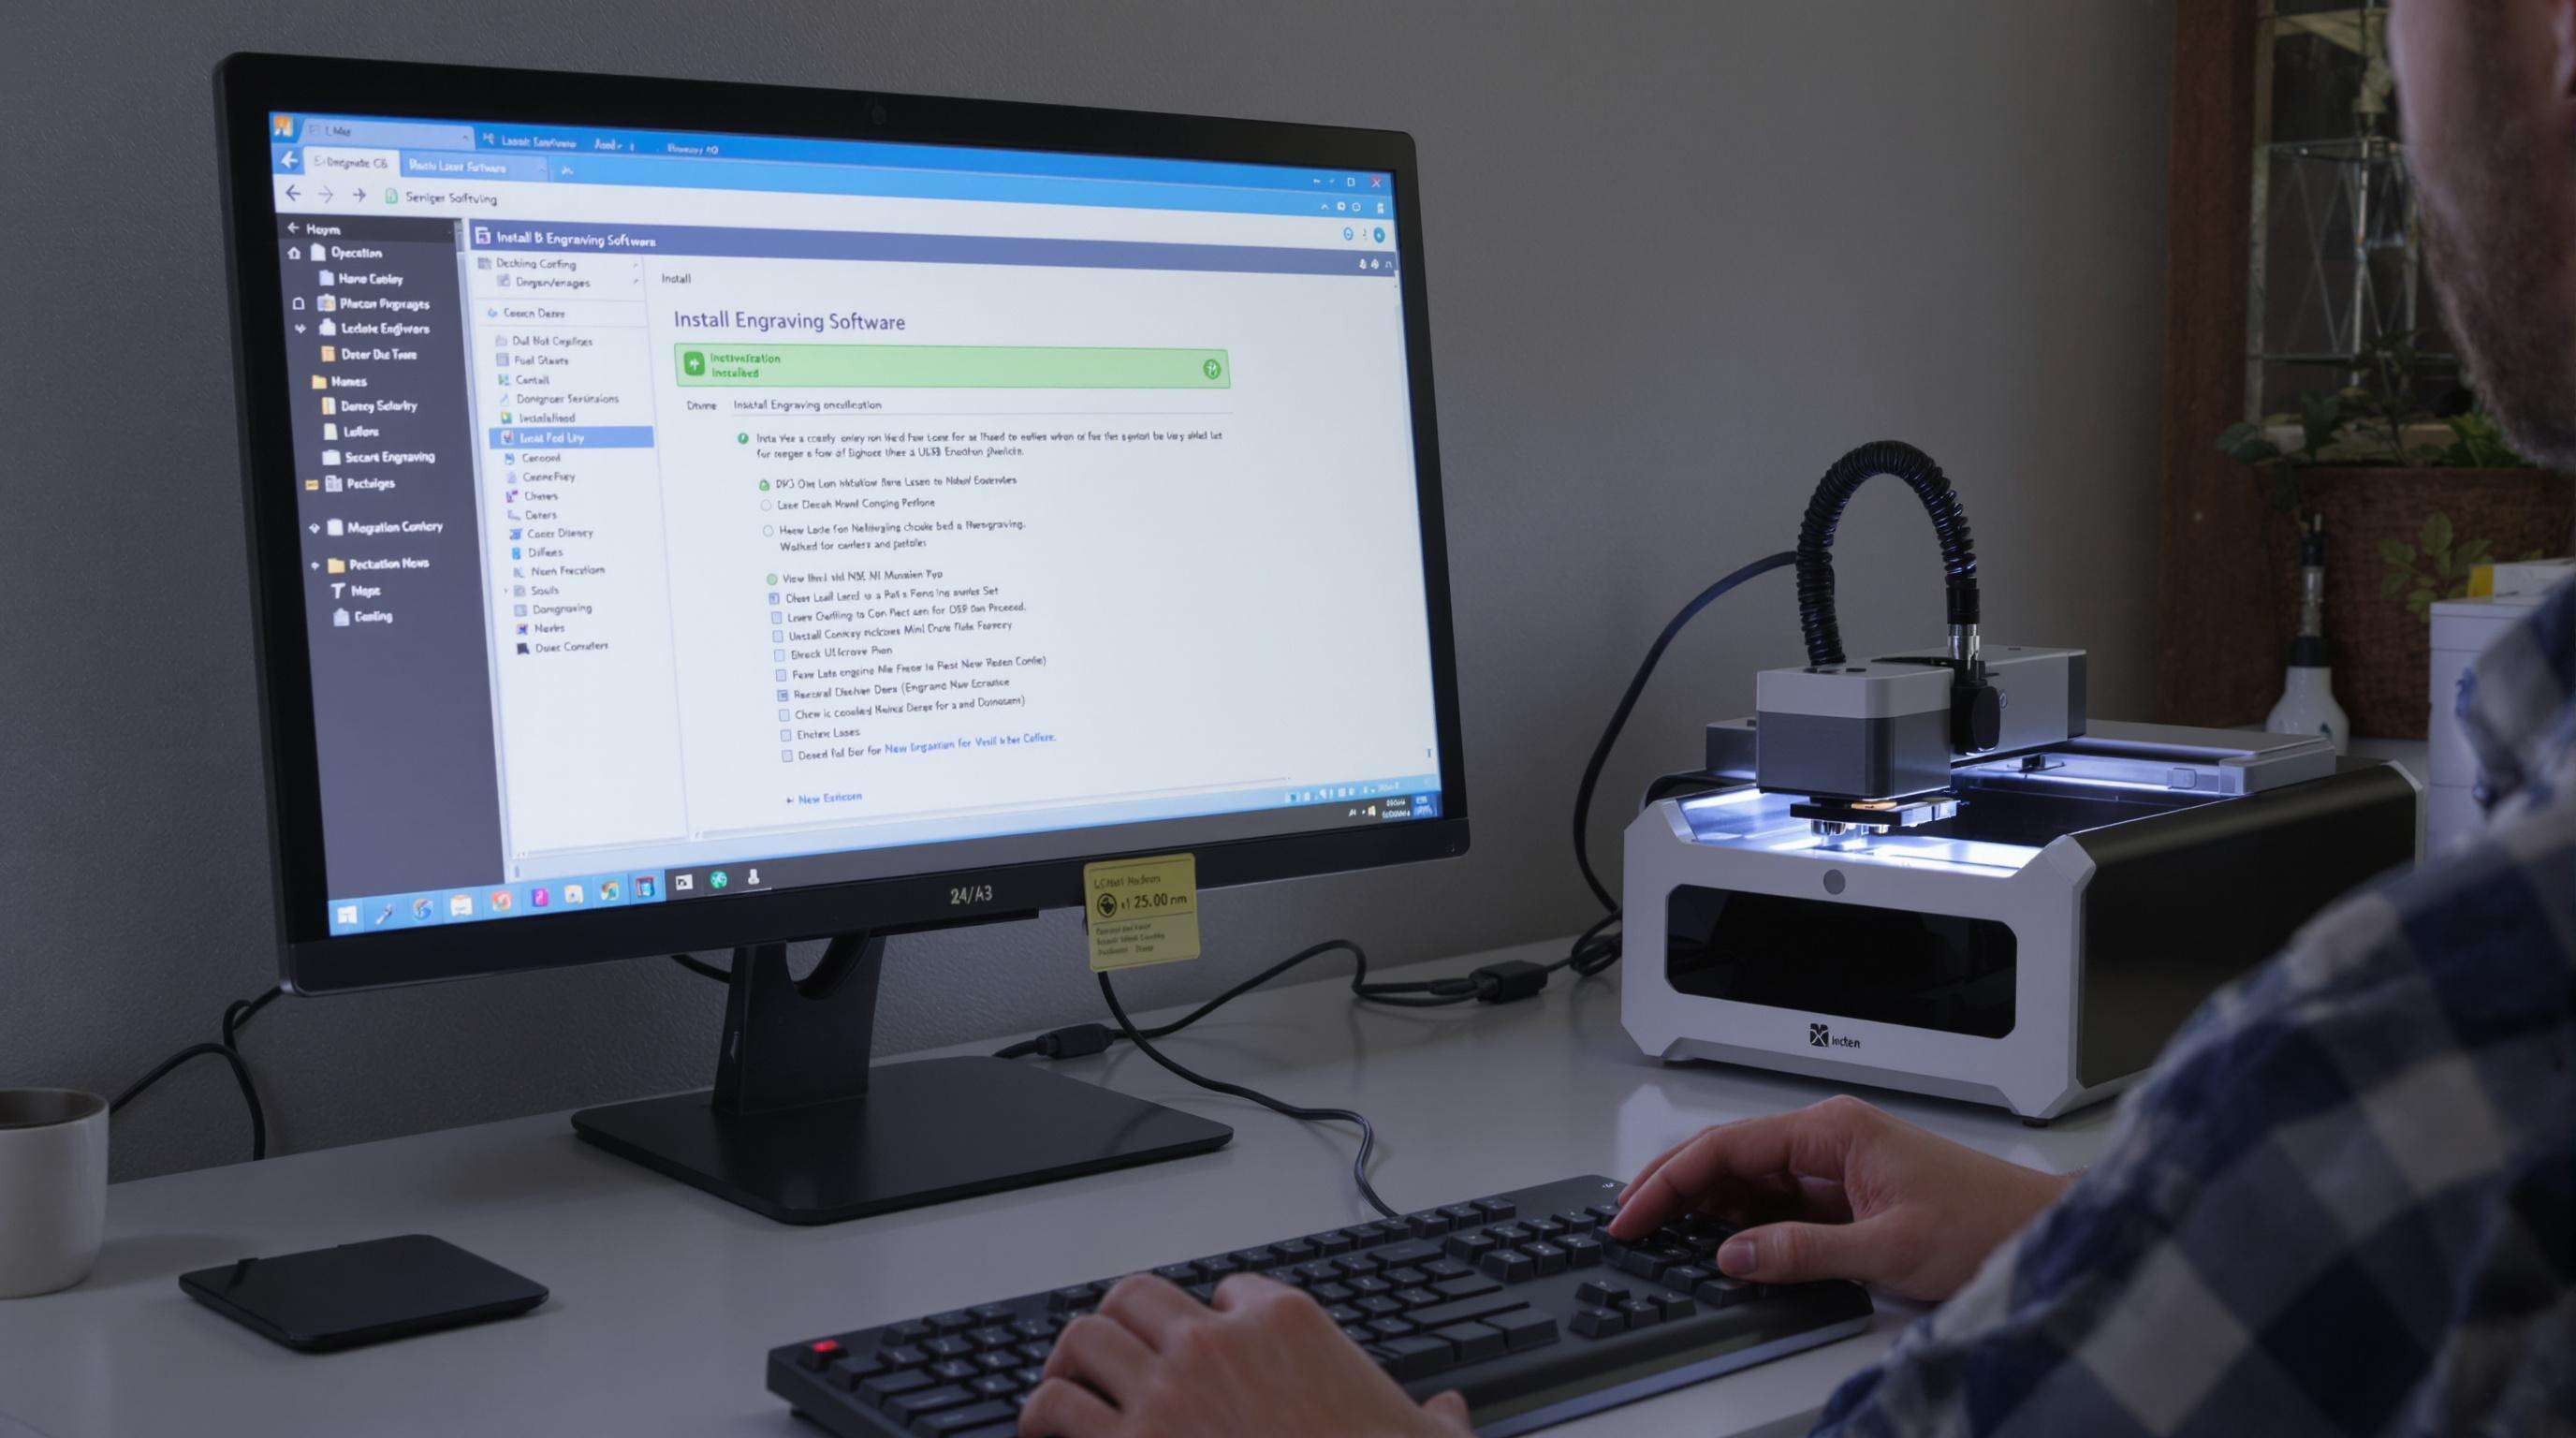
התקנה של תוכנה לפי שלבים והגדרת נהלי מערכת
- הורדה מתווך רשמי בלבד.
- כבה זמנית את האנטי-וירוס במהלך ההתקנה.
- חבר את המכונה שלך באמצעות USB לפני הפעלת התוכנה.
- הרץ אשף נהלי מערכת אוטומטיים בפעם הראשונה שפותחים את התוכנה.
- ודא שהגירסאות של התוכנה הקבועה תואמות את מפרט היצרן.
הימנעו מהוסתות USB כדי למנוע ניתוקים. אתחלו את המחשב והמכשיר לאחר אתחול הדרייבר.
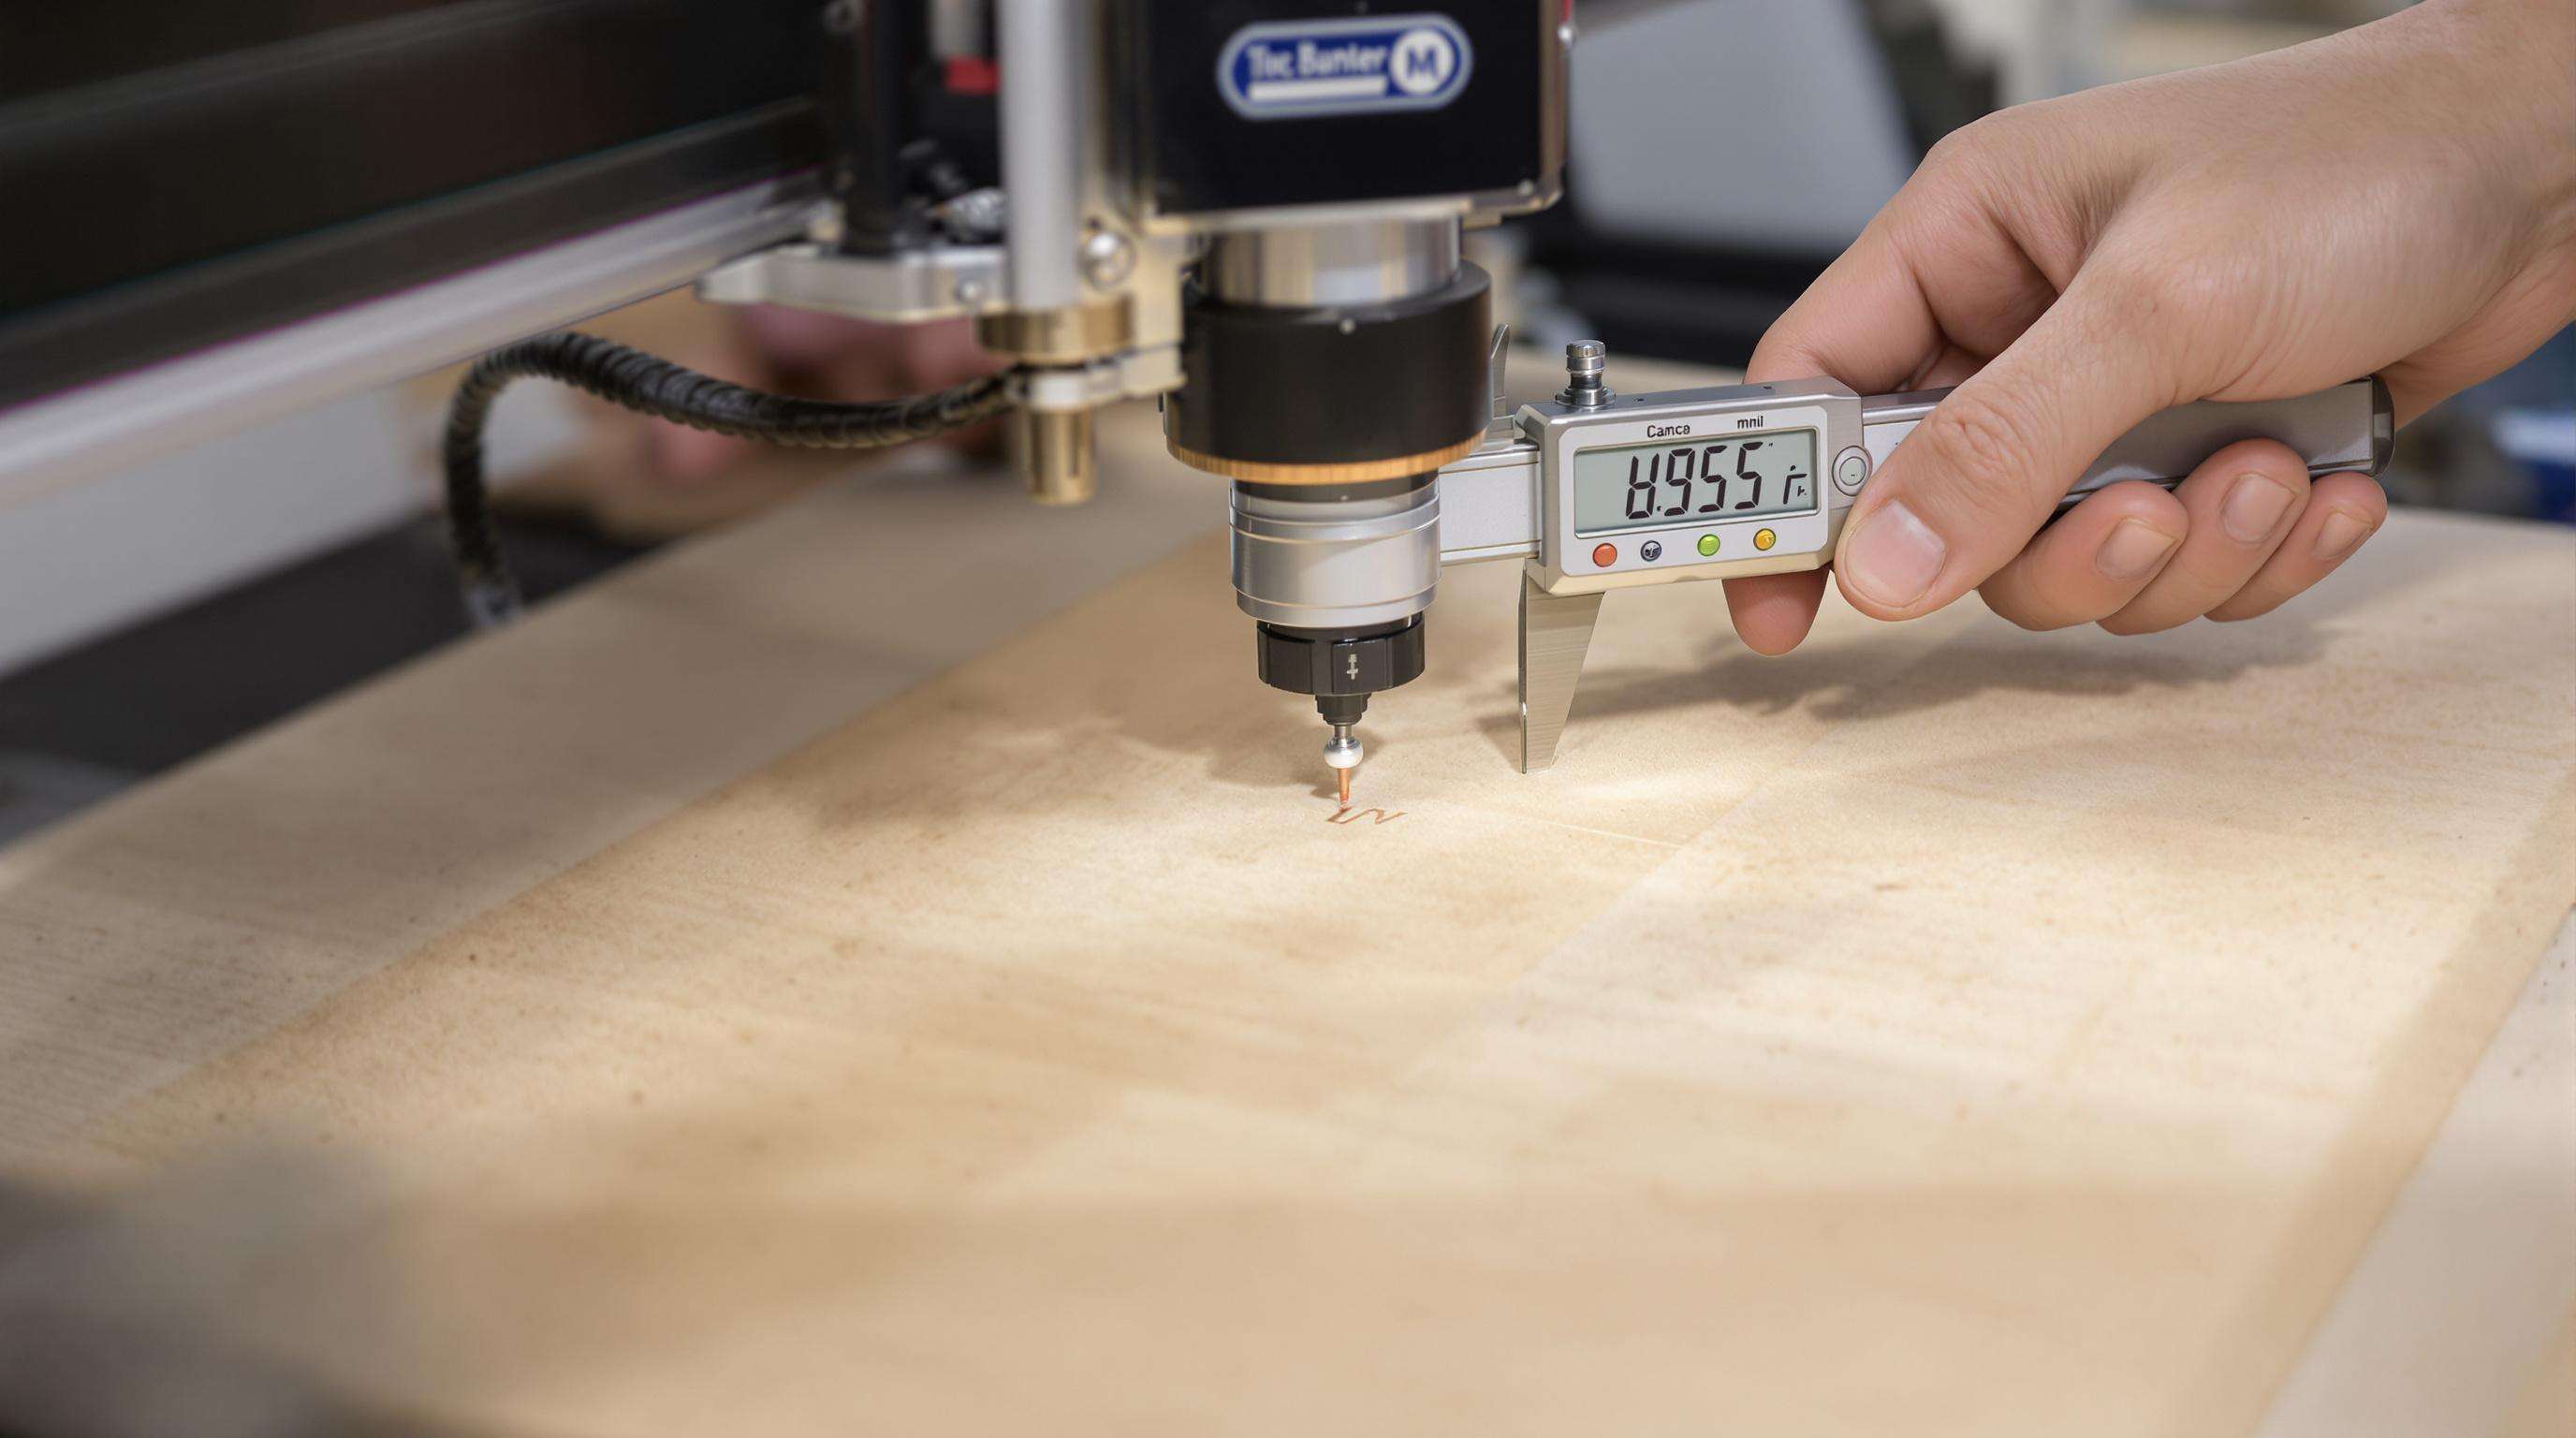
איפוס מכונה במנתח
דיוק מחייב סינכרון בין דיגיטלי לפיזיים:
- היכנסו למודול האיפוס בהגדרות התוכנה.
- בצעו ריבוע בדיקה של 25 מ"מ חריטה.
- מדדו סטיות בעזרת מדידת אבניבר דיפרנציאלית.
- הזינו ערכים לפיצוי ממדי.
- חזרו על הפעולה עד שהשגיאה תרד מתחת ל-±0.1 מ"מ.
מטריצות קליברציה חייבות להישמר עבור כל סוג חומר. השמטת משתני התפשטות תרמית גורמת ל-23% מהשגיאות הממדיות בחרטת עץ ( תקציר מדע החומרים , 2024).
שיטות התאמת פוקוס עבור מכונות חריטה בלייזר מיניאטוריות
הפוקוס האידיאלי הוא בעל חשיבות מכריעה, והוא משפיע ישירות על דיוק החיתוך וברור ההרחוק. עד ל-70% מפגמי החומר נובעים ממיקוד שגוי ( רבעוני טכנולוגיית הלייזר , 2023).
נהלי יישור עדשה עבור חומרים שונים
- עץ/אקריליק : בצע מבחן רמפה - פשט קו לייזר בזווית 45 מעלות; הקטע הצר ביותר חושף את נקודת המיקוד.
- מתכות : השתמש בשיטת תצפית הניצוץ - התאם את גובה העדשה עד שהניצוצות פלזמה יהיו מינימליים ומורכזים.
- עור : מדוד נקודות בדיקה שנשרפו במרווחים של מילימטר להתמקדות ברמת השטח.
התחל תמיד עם מדידות עובי הסטוק, שכן גובה המוקד המומלץ של היצרנים משרת כבסיס אמין.
שיטות אימות קליברציה
בצע בדיקת דפוס רשת אלכסונית על חומר מגרד; חיתוכים אחידים מצביעים על קליברציה מדויקת. מכונות קטנות מפיקות תועלת ממנועי אימות דיגיטליים בתוכנת הבקרה של הלייזר, שמציגים גרפים בזמן אמת של עומק המוקד. לחלופין, השתמש במיקרו-קלה כדי להשוות בין עומק החיתוך בפועל לבין התוכנת.
טיפ מקצועי: בצע בדיקות מיקוד אחת לשני שבועות – רעידות העדשה במהלך הפעלה גורמות להזזות קלות.
ביצוע תהליך חריטה בלייזר שלב אחר שלב
נקה את פני השטח של החלק באמצעות בד מיקרו-סיבים כדי להסיר אבק או שמננים. הקבץ את החומרים בצורה שטוחה על משטח החריטה באמצעות סרף לא מוחזר או אופרסות כדי למנוע הזזות.
ייבוא תכנון והגדרת פרמטרים בתוכנה
העלה עיצובים ווקטוריים (SVG או DXF). הגדר את עוצמת הלייזר (%), מהירות (מ"מ לשנייה) ותדירות (PPI) בהתאם לעובי החומר ולמורכבותו. צפה במסלולי הכלים כדי לאמת את הגבולות – התאמת DPI מבטיחה העברת דפוסים מורכבים במדויק.
התחלת מחזור חריטה: הגדרות עוצמה/תדירות לעץ
בסיס מומלץ לעץ:
- עוצמה: 60-80%
- מהירות: 150-250 מ"מ לשנייה
בחינה על סוכרה מחייבת עוצמה גבוהה ב-10-15% מאשר באשלג עקב הבדלים בצפיפות ( עיבוד חומרים רבעוני , 2023).
פרוטוקולי פיקוח בזמן אמת
צפו בהתפתחות העשן והปฏולה בין הלייזר לחומר. עצרו מיד אם נוצר עשן חריג או ניצוץ. מיקמו את הالتهום כדי לשלוף את הריחות מבלי להפריע לחלק בעבודה.
חריטת בחינה ואופטימיזציה של פרמטרים עבור מכונות חריטה בלייזר מיניאטוריות
בצע חקיקות קטנות על חומרים מיותרים כדי לקבוע הגדרות בסיס. תיעד כל שילוב של פרמטרים להפנייה עתידית.
ביצוע טבלאות בדיקה של מהירות/עוצמה
צור מטריצות בדיקה על ידי התאמת מהירות הלייזר (מ"מ/שניה) ועוצמה (%). לעץ, בדוק עוצמה של 10-100% בטווח מהירויות של 100-3000 מ"מ/דקה. נתח את הדברים הבאים:
- עקביות של שריפה ובהירות של הקצוות
- עיקום החומר
- רמות העשן
התאמת עומק ורזולוציה של החיתוך
שפר את הדיוק באמצעות התאמות מיקרוסקופיות:
- הגדל את רזולוציית ה-DPI (300-500) לעיצובים מורכבים.
- השתמש בעיבוד רב-עוברות כדי להשיג חקיקות עמוקות יותר ללא שריפת החומר.
פרוטוקולי בטחה במהלך הפעלת מכונת חריטת לייזר מיניאטורית
לייזרים מהקטגוריה 4 עלולים לגרום לפצעי שריפה וחורים חמורות. ניתוח בטחה משנת 2023 מראה ש-42% מהתאונות נובעות מקיצורי דרך בפרוצדורות.
ציוד בטחת לייזר חיוני
- ללבוש אמצעי הגנה על העיניים התומכים ב-liייזר (10,600 ננומטר עבור מערכות CO₂).
- להתקין חיישני מכסה ומערכות סילוק אוויר חזקה.
- לאמת את תפקוד לחצן העצירה החירומי לפני ההפעלה.
מניעת סיכונים בתהליך הייצור
- להרחיק חומרים דליקים ב-3 רגל (כ-מטר) לפחות.
- להפעיל עזרת אוויר כדי להפחית את סיכן ההתפוצצות.
- לבדוק את החומרים על תכולת כלור/PVC.
נהלי תגובה לשעת חירום
- להציב מטفئי אש של CO₂ בטווח השגיגה.
-
לעקוב אחר "הליך השבתה תלת-שלבי":
- להפעיל את כפתור החירום.
- לחתוך את החשמל מהמקור.
- להפנות את הצוות החוצה.
בער exposure לעיניים, להשתמש בתחנות שטיפת מי מלח ולחפש טיפול רפואי מיד
שאלות נפוצות
מה עליי לעשות אם רכיבי מכונת הקישוט הלזר קטנה שלי ניזוקו במהלך המשלוח?
אם תגלו שניזוקו רכיבים, יש לתעד את הפגיעות מיד ולפנות לייצרן לצורך תמיכה וחלפים פוטנציאליים.
כמה חשובה איזון מכונה לקישוט מדויק?
אפסון מכונה הוא קריטי כדי להבטיח חריצה מדויקת. אי-alinuity או אפסון לא נכון יכולים להוביל לדיוק נמוך בעבודתך.
איך אני מבצע בדיקת enfוקוס עבור חומרים שונים?
חומרים שונים דורשים טכניקות בדיקת enfוקוס ספציפיות. עץ ואקריליק משתמשים בבדיקה בשיפוע, פליזים משתמשים בבדיקה באמצעות תצפית באש, ולجلודה יש לבצע מדידה של נקודות בדיקה.
אילו ציוד ביטחון יש להשתמש בו בעת הפעלת מכונת חריצה בסיסית?
תמיד ללבוש משקפי הגנה נגד לייזר ולדאוג לתנור מתאים. ודא שפונקציית העצירה החירומית תקינה למניעת תאונות.